Designing a Garden From Scratch: The Concept Plan
After completing your analysis, it is time to explore concepts for your garden design. The best way to do this is by using bubble diagrams.
Designing a home garden can be a gratifying task, but all too often people find they don't know where to start. Today's post is the second in a new series where I will explain a simple process to follow for creating a garden design.
Creative Process Begins Now
Following on from the first post in this series, you should now have completed your site analysis and are ready to start creating concept plans. The Site Analysis was all about collecting facts; the concept plan is where you start to get your creative juices flowing.
Eventually, you will have a detailed site plan showing where all your plants will go, and scale outlines of hardscaped areas. At this stage, you do not need to worry about any exact measurements or small details. What you are doing here is exploring the basic concepts of your design and a general layout for how it will unfold in your outdoor space.
You may not know where to begin with your concept. This is fine, as it helps to come to this stage with an open mind. At this point in the design process, all you need is a basic understanding of your site, and what you'd like to use it for. Even if you do have a clear vision for your ideal garden, try to explore other options. Failure to explore ideas and options is the biggest mistake to make when designing any space.
Site Map
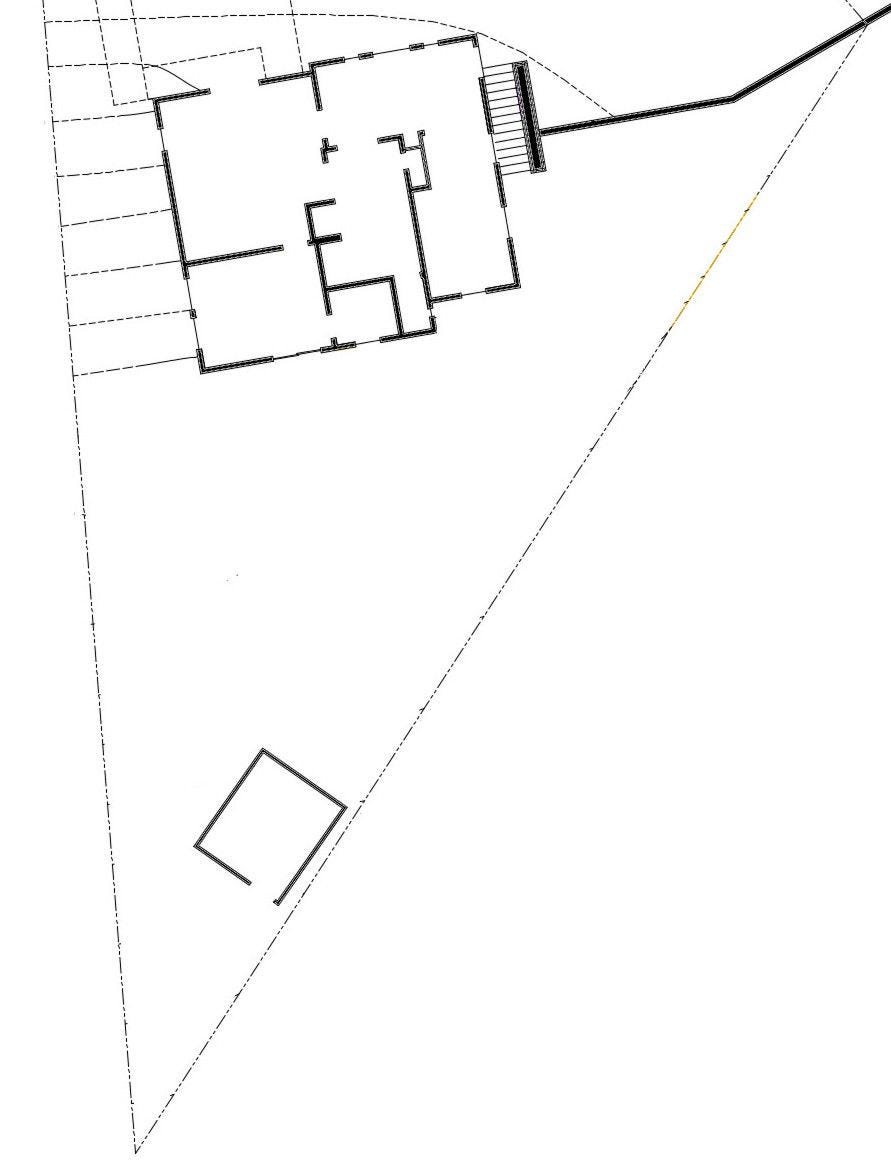
During your site analysis, you will have created a site map of your garden site. As with the analysis, the site map does not need to be 100% accurately measured and to scale. This site map will also be used for your concept plan.

Bubble Diagrams
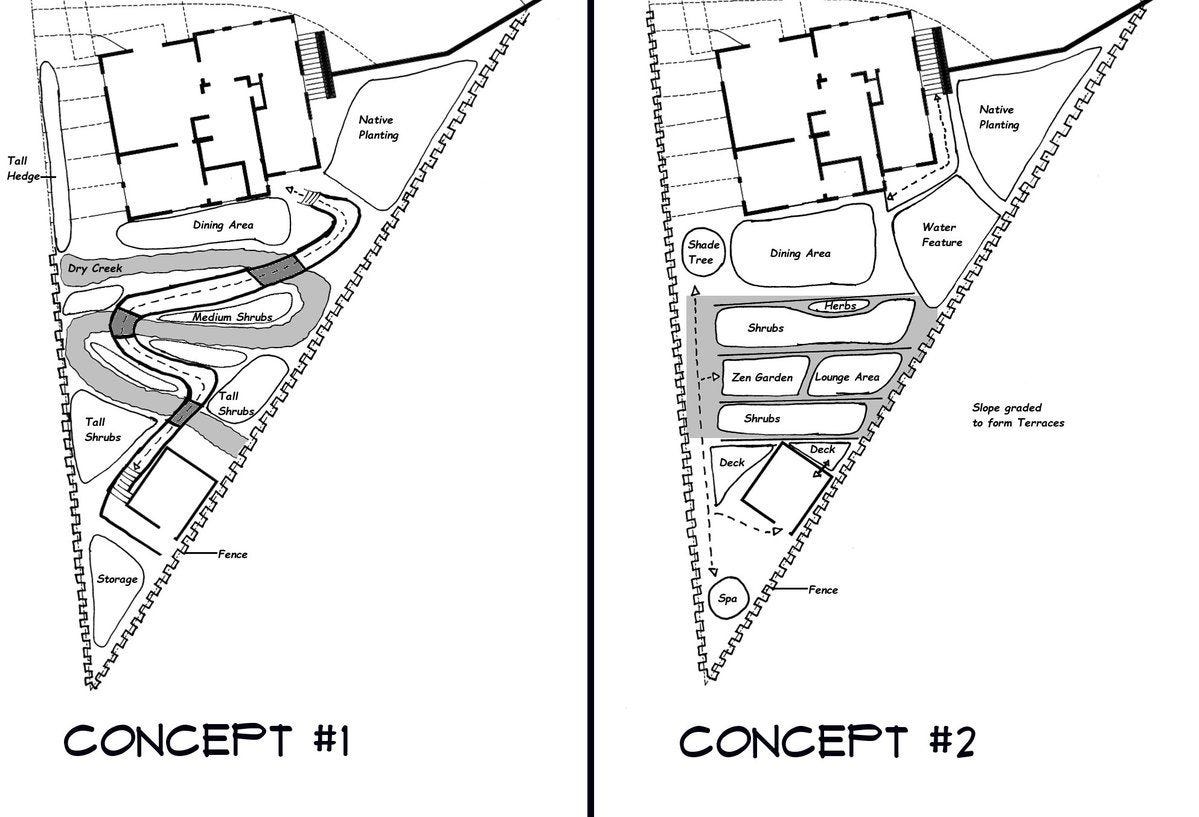
I have found the best way to explore concepts is to use bubble diagrams, where you are organising your space into general areas and showing how they relate to each other. Doing it this way means you don't need to worry about specific materials or figuring out the exact dimensions for anything. The detail can come later, once you have decided on your concept. Keeping it simple will allow you to iterate through multiple ideas until you are satisfied.
You should always aim to create more than one concept. This means at the end of this stage in the design process, you should have completed at least 2 bubble diagrams that you are satisfied with.
Program
Before you start on your bubble diagram, you should brainstorm a list of requirements for your garden. In the design world, this is known as your program elements or requirements.
Examples of Program elements could be: a lawn, outdoor dining area, outdoor kitchen, herb garden, hot tub, fruit trees, etc. All you need to do here is write a list, you don't need to worry about where each element should be placed just yet.
It is OK if you are struggling to create this list. You may not know exactly what you want in your garden, so this list can also be written in more general terms. In the example I am using for this post, the program elements were not well defined at the beginning. The client felt overwhelmed at trying to figure out what to do with their sloping back garden. The client's needs were to have a garden that is drought tolerant, provides good access to their studio, creates some privacy, and some spaces for relaxation and entertainment. It was then my task to figure out what program elements would suit that criteria. You may find yourself in a similar situation, and if you are struggling to come up with any requirements, my advice is to think about what you don't like about the current space, and that will help you figure out what program elements can improve your space.
Creating Your Bubble Diagrams
Now that you have your program elements listed out, start allocating spaces to your site map for each element and think about how they relate to each other so that their adjacency and placement make sense. Use tracing paper over your site map so that you can create multiple diagrams for quicker iterations.
If you are not sure where to start, think about some obvious constraints for where these spaces should be. For example, it would make sense to have an outdoor dining area closer to your home so that it is more convenient to your kitchen. But what if the area close to your home is shady and cold, maybe it makes sense to place this elsewhere? Think also about sight lines from your house. Most of us spend more time looking at our garden from the house than the outside, so place areas where they create good views from your home. On a similar note, think about what you might not want to see, e.g. a compost pile or an air conditioning unit. Once you have figured out where the elements should be based on these types of constraints, this should give you a good starting point for the placement of other elements.
Here are a few pointers to keep in mind when creating your bubble diagram:
When creating your bubble diagram, you should fill every space with a bubble. You may struggle to figure out what to do with any empty spaces later.
Use a loose, freehand style to draw out your bubble diagrams. This stage of the design process is all about creativity, you don't want to get bogged down with details at this stage. Also, do not worry about presentation: as long as you can read and understand it, that is all that matters. If you are designing a garden for someone else, you can use software like Adobe Illustrator or Inkscape to create more polished versions of your concept.
Use a pen, not a pencil to make your diagrams. By using a pen, you can't erase and make edits, this forces you to think assertively about what you are committing to paper, and prevents second-guessing yourself.
Do not think about specific plant or hardscape materials. This will only distract you and slow you down. Label your bubbles with general terms like "tall shrubs", "fruit tree", etc. You can figure out these specific details once you get to your final design.
Pay attention to circulation. Make sure that your bubble diagram shows how you navigate the space and make sure it makes sense to navigate that way.
Challenge yourself to come up with very different layouts from each other. Each bubble diagram should represent a unique design. Even if you have a preconceived idea of how you would like to organise your space, trying a different layout may open your mind to new possibilities.
Final Steps for the Concept Plan
Once you have created several bubble diagrams, choose at least 2 to decide on your final concept. When designing a garden for someone else, have them decide which concept works best - it is always easier for people to choose from options than to try to sell them on one idea only.
At this stage, you should be moving forward with just one concept. It is perfectly fine to combine elements from each concept or to choose one outright. For instance, you might choose concept #1 in the above example, but decide that you'd like to have the spa from concept #2 in place of the storage area. When combining your choices, create a new version with these combinations so that you don't confuse yourself later.
Once you have decided on your concept, the next creative step for your design is to define the structure of the spaces each bubble represents. Before we can do that, if you haven't done so already, you will need to create a scale drawing of your site, which is the topic of our next post in this series of the Garden Design Process.


